Note: For those interested in virtual production, I have published a version of this on this website as part of a collection of virtual production resources.
While working on a building a small virtual production test studio, one of my tasks was being charged with building DMX light panels, and connecting up existing DMX lights to Unreal. The first version of this included using ESP8266 boards and Art-Net to receive the Art-Net broadcasts from Unreal. This works fine and there is a lot of great information online about how to accomplish this. We quickly found that when adding a lot more lights and universes that there seem to be some performance issues. Ultimately, instead of improving the existing setup, it was decided to abandon WiFi in favor of a more stable wired setup.
Wired Connections
Some of the lights we are working with are Amaran T2c and T4c RGBWW lights. These are DMX capable over USB-C (3.0/3.1) using RX1/TX1 (which are internally connected to RX2/TX2 to allow chaining). The USB-C DMX cables aren't available at the time of writing this from Aputure, so I built several (thanks for YouTube Larry for the breakdown). Keep in mind that RS485-A is generally the non-inverted signal, and RS485-B is the inverted signal - also be sure to connect ground.
Now it was time to send some DMX data to the light to test the wired connection. Having tried Freestyler and not exactly loving it, I tried QLC+ this time around. The light's intensity was able to be controlled over channel 1 (see T2c/T4c DMX Weirdness below for more on this).
Unreal Art-Net
To use DMX in Unreal, you need to install some plug-ins. The full setup would be to lengthy for this post, so I am going to start with the assumption that you have data set-up to Universe 1, Channel 1 (i.e. Pixel Mapping, DMX Library Fixtures, etc.). To make sure Unreal is sending DMX over Art-Net, go to Project Setting and search for DMX. Make sure to set the Protocol Name to Art-Net and choose the correct Network Interface Card IP Address (this could be the loopback address 127.0.0.1 or the loopback over the assigned machine IP [in my case: 192.168.1.255] or whatever address your QLC+ is running on).
QLC+ Set-up
Because Unreal only supports DMX over Art-net and sACN, it will not connect directly to the USB DMX cable. To solve this problem, QLC+ comes with a mapping utility that lets you specify and input (i.e. Art-Net) and an output (USB-DMX). Here is how I set this up in QLC+. If you don't have your DMX cable setup already, check out this post here.
On the Inputs/Outputs tab at the bottom, go to the panel on the right-side called Mapping. Find the ArtNet Device with the IP associated with your Unreal instance (or loopback address on same machine) and check the box for Input. Now check the Output box for you USB-DMX device.
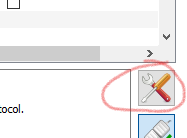
Select the row for Art-Net again and look for the Screw-driver/Wrench icon under the Mapping panel. Click that button.
In the window that comes up, be sure to select the Art-Net universe associated with your Unreal Instance, then click OK.
Last, you have to enable the Universe in QLC+ to be a passthrough Universe. You do this by checking the Passthrough checkbox at the top of the Universe list on the left side of the screen (with the configured Universe selected).
Now, choose the Simple Desk tab at the bottom of the screen in QLC+, you should see the sliders adjust automatically to the channel values from from Unreal. If the slider is red, click the X button below it to allow it to show the values received from Unreal. Oddly, the slider being red does not override the values being passed through - it just will not show you them in this screen.
T2c/T4c DMX Weirdness
Aputure released a document as of June 2022, which has DMX specs broken down. Unfortunately, my personal experience showed this document to be less than helpful. For starters, it does not define how you set modes on the light which in turn will define how the channel values will affect the light (i.e. mode, color, etc.). I've reached out to Aputure (who has been very helpful in the past) to get clarification on how to properly set this up and they have offered to assist. I'll update this post with more information as it and my time becomes available :)
Update: After working with Aputure support, they determined that the problem was in using an iOS phone to update the firmware for the lights. Switching to an Android and using the Sidus Link app, I was prompted to install the latest firmware which included capabilities for setting DMX profiles which better match up with their documentation, but not quite. Fortunately, you can kind of decipher which each mode and the channels they use from the menu. You may have to reach out though if you find there is not enough information.


No comments:
Post a Comment